My Camera Set-Up and Settings for Fuji X Cameras

Hi everyone, and welcome to this blog post on the camera settings I use with the Fuji X System. This is a question I have received several times and it often comes up during workshops where I see so many folks struggling with their cameras and settings. Now, while the focus of this post is centered around my Fuji cameras, I will say that the best set-up is the one that works for you and makes you feel confident as you operate your camera. And in order to do that you need to learn the operations of your camera system forwards and backwards, develop an understanding of how you want to approach your photography, and then practice until it becomes automatic. The last thing you need to be doing during the moment of capture is to fumble with your camera or the settings.
I set up my X-T2 and my X-Pro 2 in exactly the same way. The reason for this is simple; no matter which camera I grab out of the bag, I know what the settings are and that the two camera bodies will function in the same way. With only some subtle variations, I use the same settings and set up for all of my various photographic endeavors – landscape, street, architecture, and portraits. It is all about simplicity my friends. I can take any of my camera bodies out of the bag, and with confidence, know that I can be shooting within seconds of turning the camera on. Fuji X cameras have a lot of technology under the hood but once you have settings established you rarely have to go back to the menus for anything. The three main things you really need – aperture, ISO, and shutter speed – are right on top of the camera. So let’s take a look at the settings I use.
Basic Settings, Set-up, and Functions
File Type: For landscape work I shoot in RAW Mode only. All files will be processed from RAW using Lightroom, ACR, or Iridient Developer, and then finished in Photoshop. RAW Recording is set to Uncompressed. For street work, or people, I will use RAW + JPEG Fine and I will employ the Fuji Film Emulations.
White Balance: Auto. I hardly ever vary this as it can be manipulated in post processing.
Noise Reduction: I have this set to 0 as my default.
Long Exposure Noise Reduction: Off. I never have this on unless I am shooting a very long exposure such as a star trail.
Dynamic Range: I leave this set to DR100 as my default.
Brackets: I will occasionally shoot a defined bracket set of images. More often than not I don’t do this as I am always making my brackets while looking at the histogram. But if I need a quick bracket set I can switch to this in the Drive Mode. I have my Exposure Brackets set to 1-Stop apart. So this will be one shot at my defined exposure, then at shot 1-Stop Under, and a shot that is 1-Stop over. I do wish Fuji would change the Firmware to allow 5 to 7 stop differences. Brackets in the X-T2 can be set in the Shooting Menu > Drive Setting > Bracket Setting. Brackets in the X-Pro 2 can be set through the Drive Button on the top D-Pad of the camera.
Color Space: Adobe RGB
Card Slots: Both my X-T2 and the X-Pro 2 have dual card slots, one of the endearing features I love about these cameras. My Card slots are set to Sequential, which means, that when one card fills up, the camera switches to the other card. You can set it to BackUp and RAW/JPEG as well but I never use these. On occasion I used the BackUp Mode but I usually do not sweat card failure.
Image Size: I typically leave this at the default range of L3:2. Any relevant cropping I will perform in post-processing
Film Emulations: I love the Fuji Film Emulations and use them often when shooting in the RAW + JPEG Mode. But I use them even in shooting RAW as a Live View Screen setting to get a sense of what a final image might look like. The Velvia and Astia Emulations give the LV Screen image a color boost and the ACROS Emulation lets me view the potential of a B+W image.
Function Buttons: The Function Buttons are a way for you to customize the settings you want close at hand. For my camera’s I have made sure that the button assignments I use are the same on each camera body. There is a slight difference in what you can assign on the X-Pro 2 versus the X-T2, relative to the Front FN Button and the top of the D-Pad. But the other buttons set up the same for each camera. You can assign the various FN Buttons by going to the Set Up Menu > Button/Dial Setting > FN/AE-L/AF-L Button Setting, and work through the diagrams. The following list is how I assign my buttons:
Front FN Button On my X-T2 it is set for Face and Eye Detection. On the X-Pro 2 it is set for Bright Frame Simulator and indicates image framing when using the OVF;
FN Button > Wireless Communication;
Left D-Pad > Film Emulation Mode;
Right D-Pad > Timer Setting; Having this handy is very useful when I am shooting a longer exposure without or without my electronic shutter release.
Bottom D-Pad > AF Mode; This is Single Point, Zone, or Wide Tracking
Top of the D-Pad > AF Custom Settings on X-T2, (This is similar to the Drive Mode on the X-Pro 2). The Drive Mode on the X-T2 is just under the ISO Dial.
AE-L Button: This is set to AE-L Only
AF-L Button: This is set to AF-L Only
Having these set in a similar fashion for both cameras just keeps the mental gyrations while shooting to a minimum. I think setting Function Buttons comes down to your personal way of shooting and camera operations you want at your fingertips.
Focusing: I switch between S, C, and Manual focus depending largely on what I am shooting. In operation the S Focus Mode puts the focus at a single point or zone. The C Focus Mode continually seeks focus and is good for moving objects. For my landscape work I shoot in entirely in Manual Mode – manual focus and manual settings – and at the native camera ISO of 200. (more on some of this below). For street work I typically use AF and utilize the Joystick to move the focus point. I will often switch to C Focus Mode and select Continuous Low CL, or Continuous High CH Modes which fires the shutter in high speed bursts when shooting sporting events. CL will shoot from 3 to 5 burst frames and CH will fire from 8 to 14 burst frames. In addition you can couple this with one of the five Custom AF Settings in the X-T2. I am not afraid to work the ISO when shooting on the street and invariably go over 800 to 1000. For Manual Focus I use Focus Peaking. This coupled with the Focus Distance Scale is a great way to dial in your focus and know you have the shot. To set Focus Peaking go to AM/FM Setting > MF Assist > Focus Peak Highlight > Then select your Peaking Option. I use the Red (High).
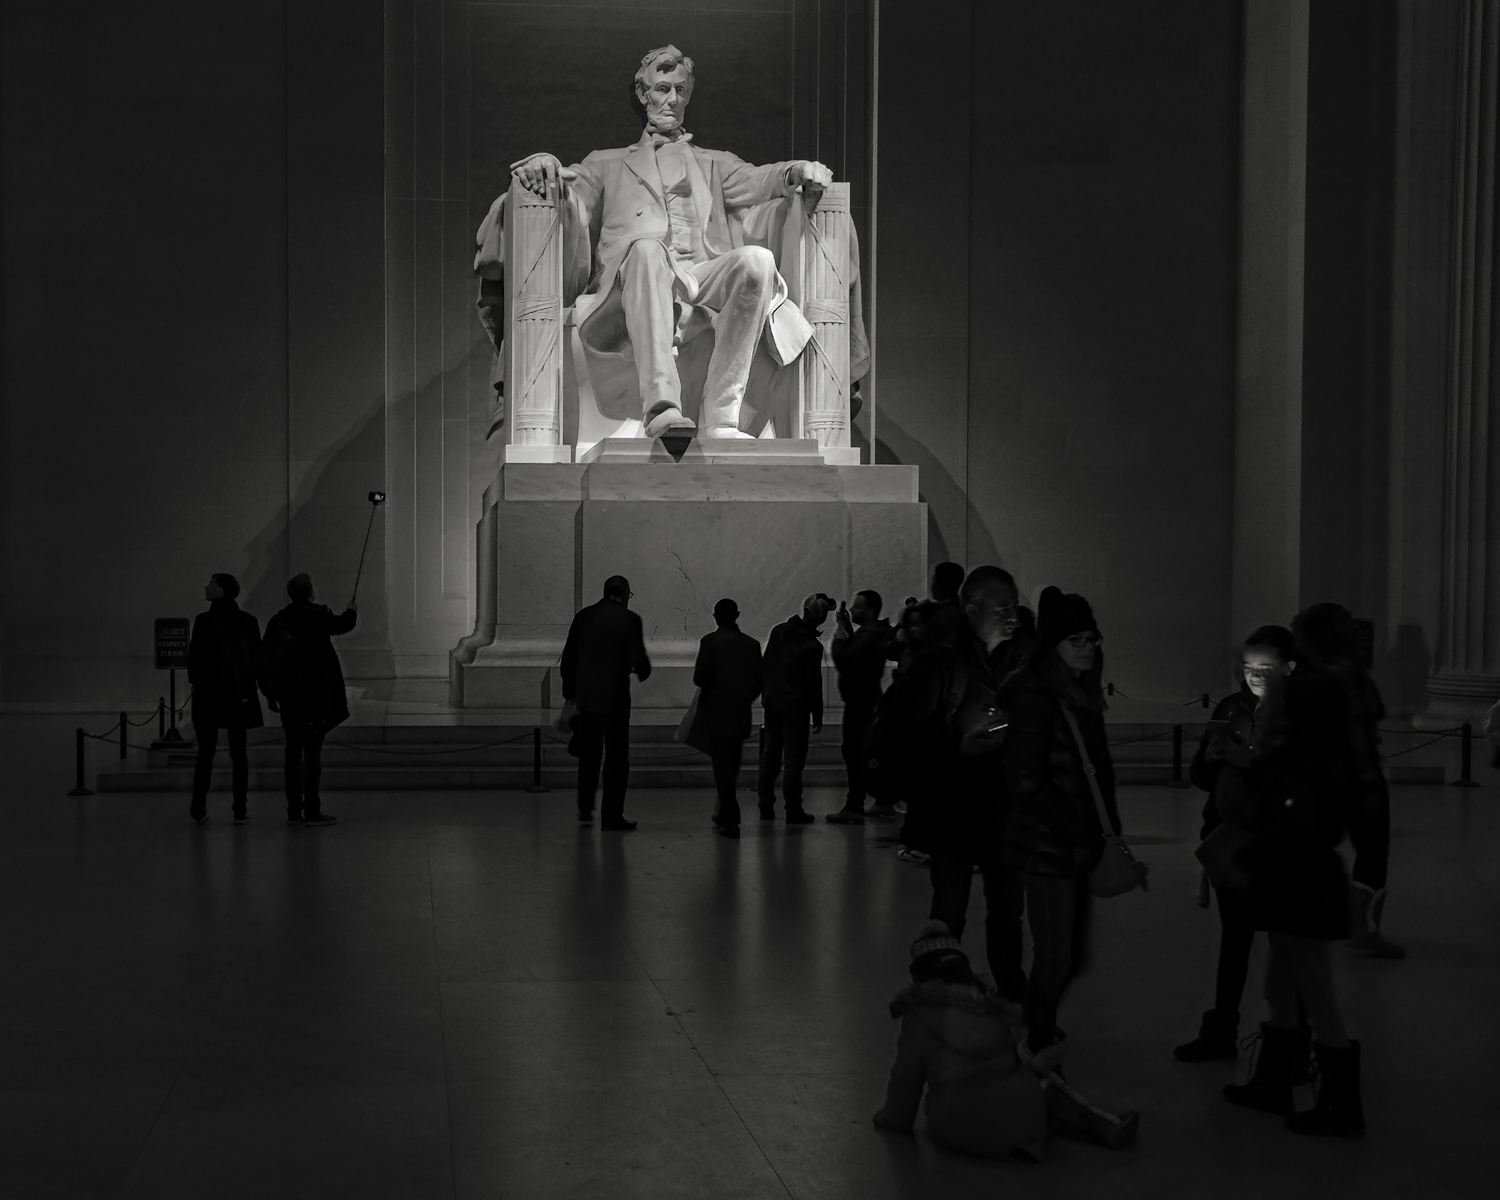
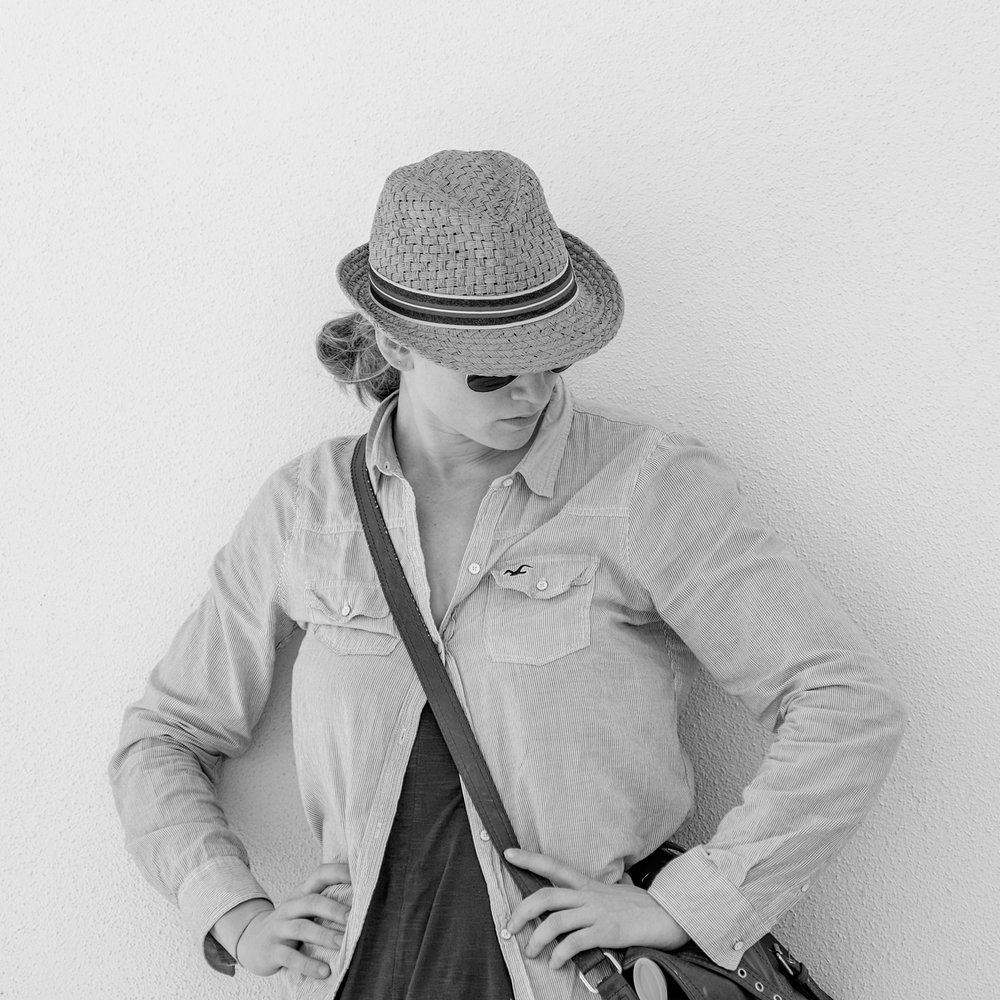
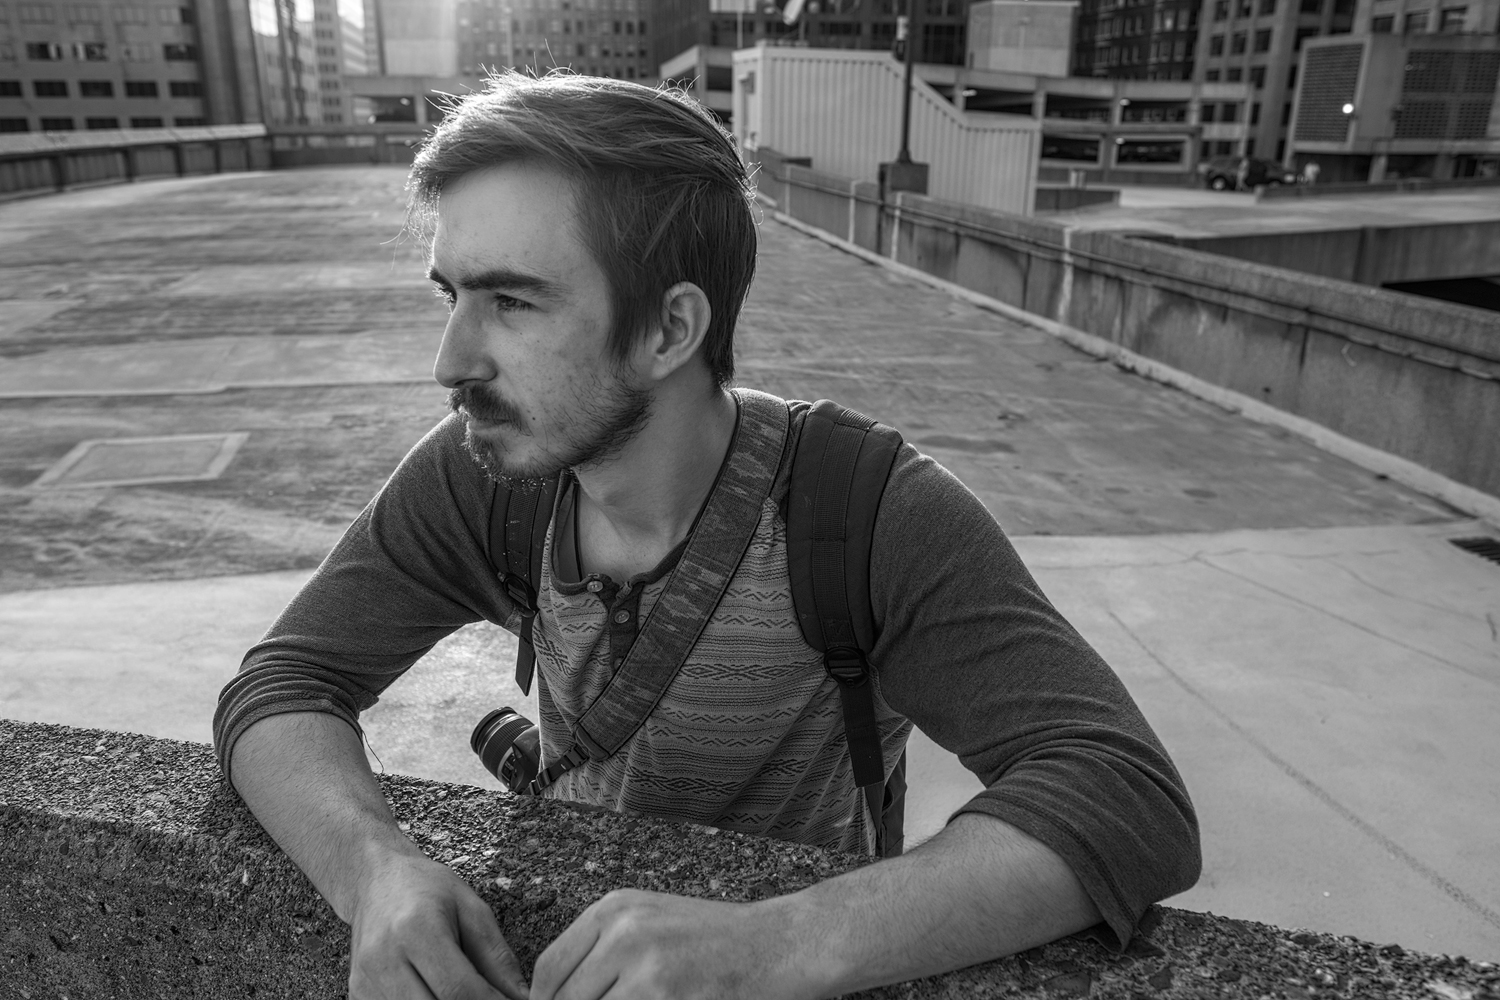
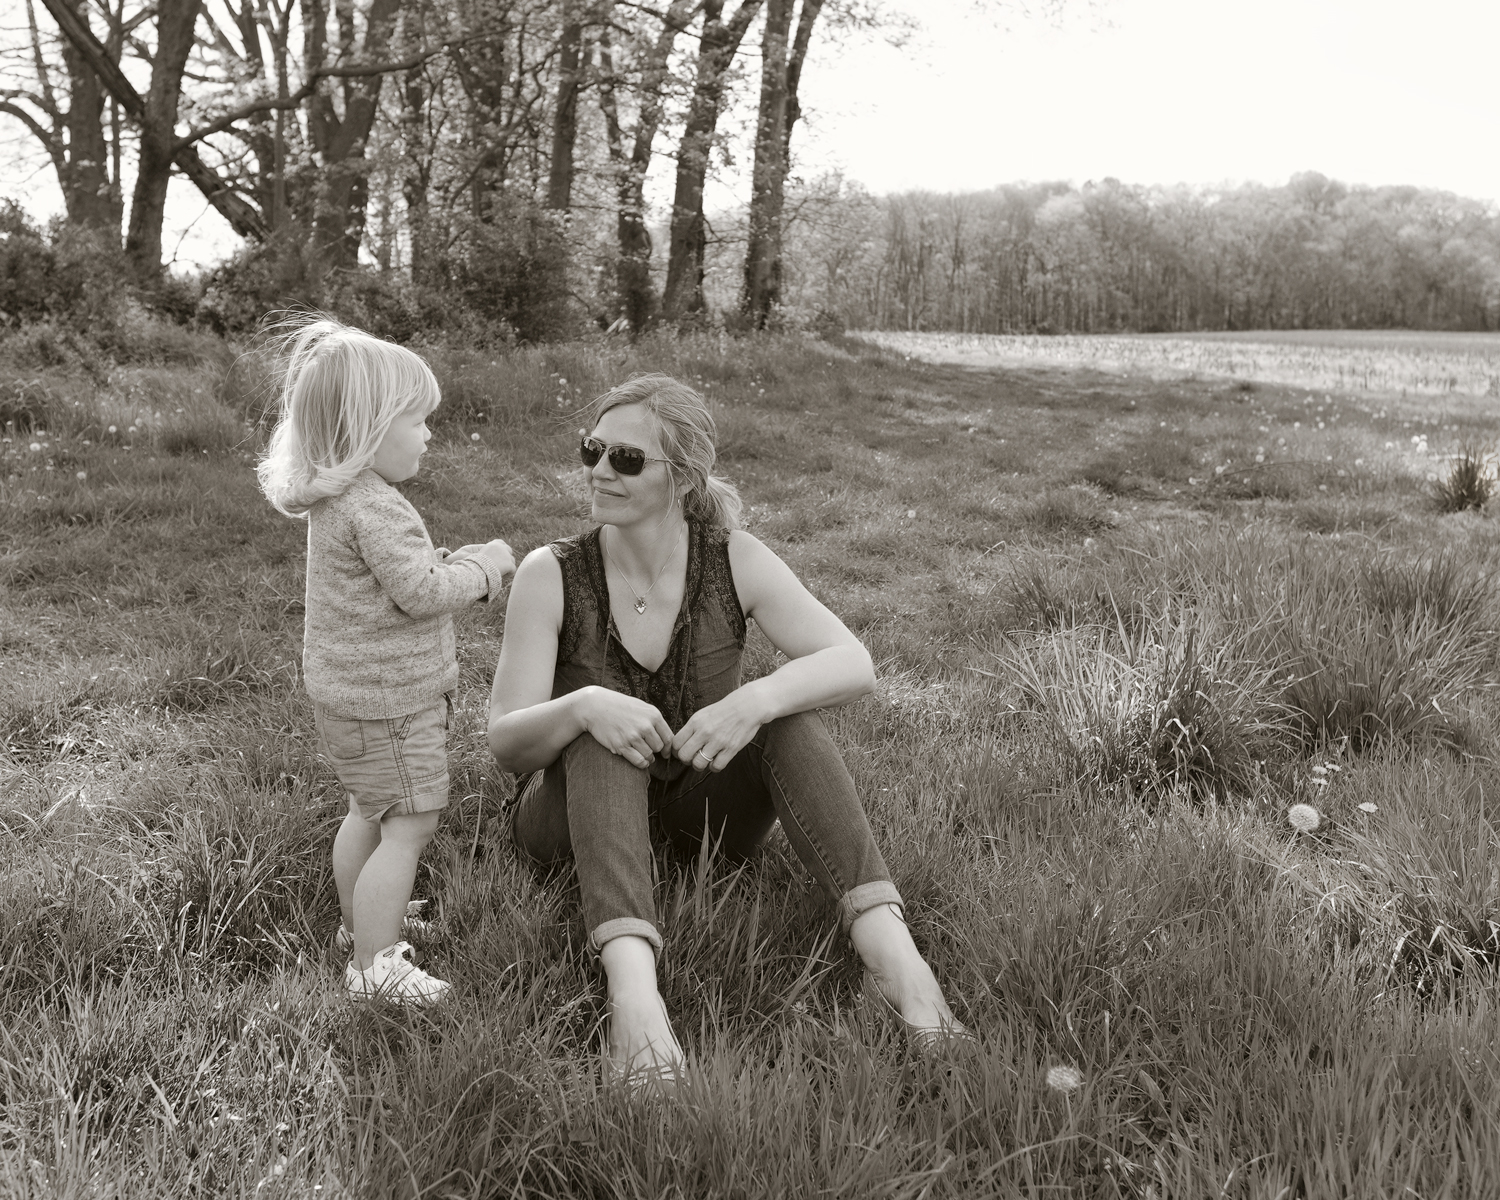
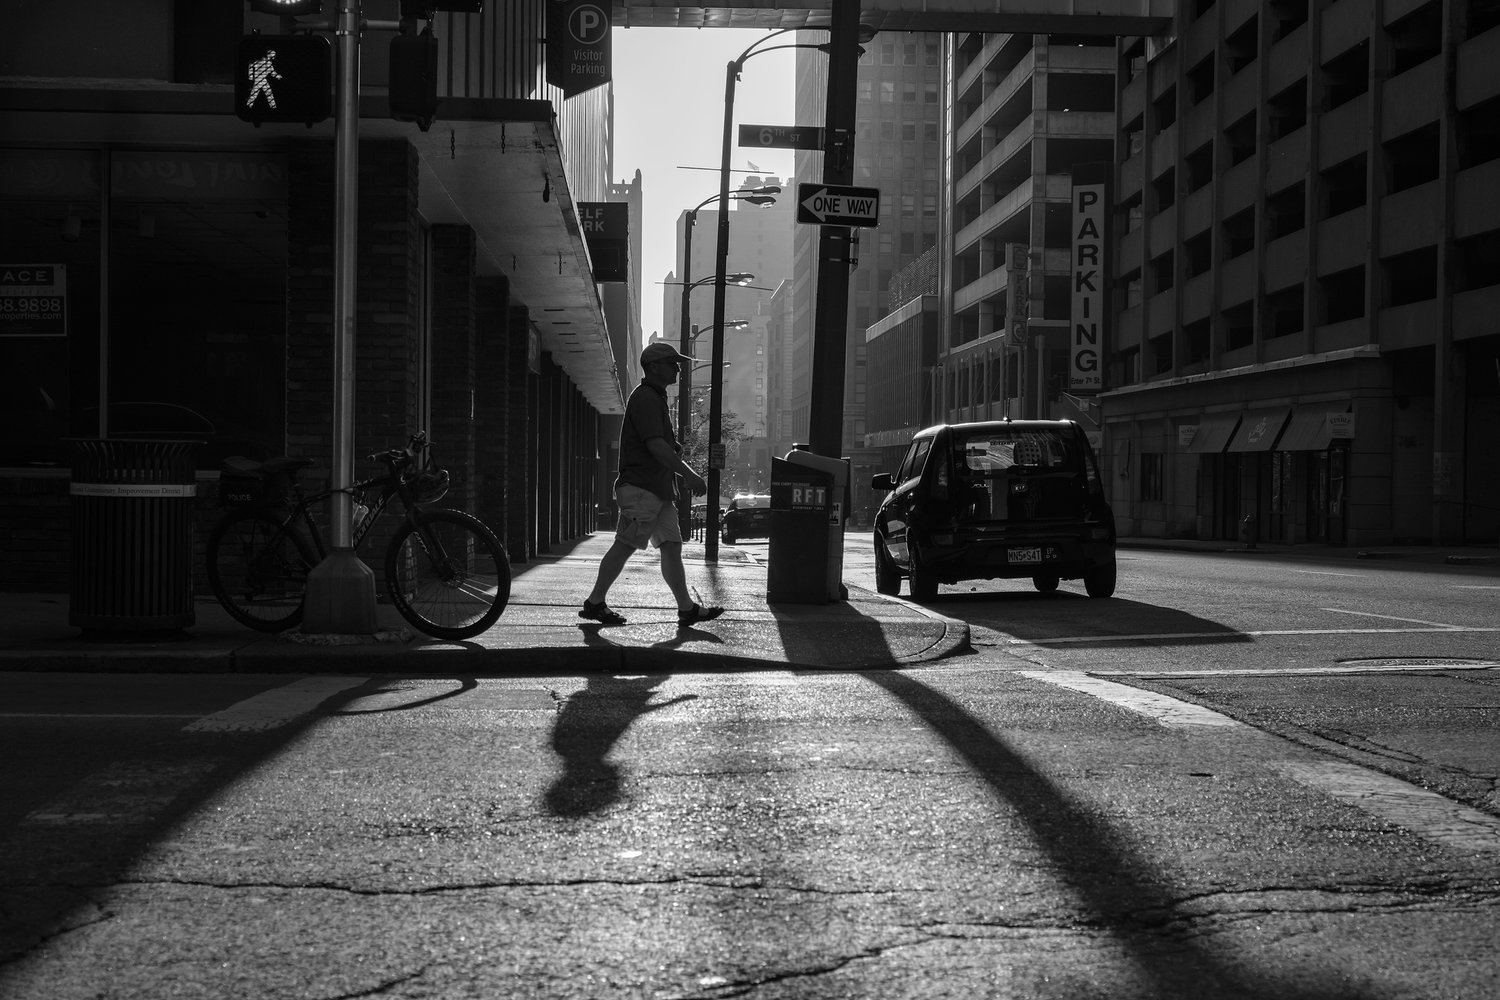
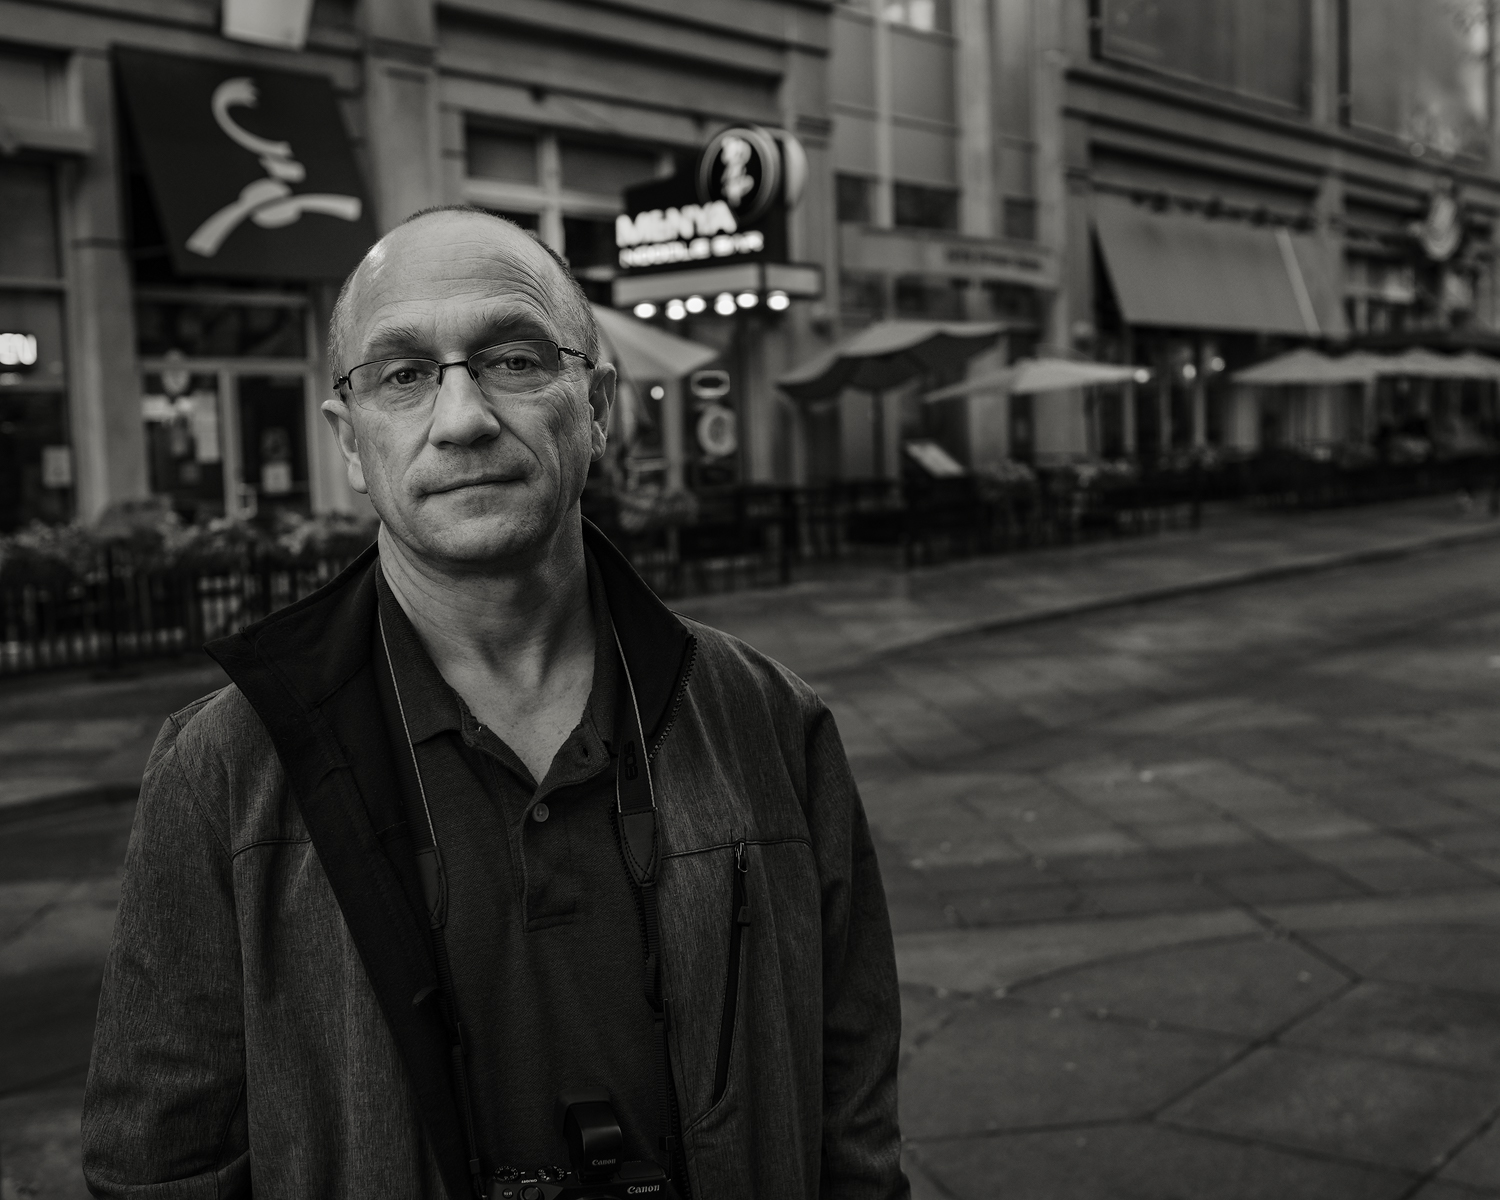
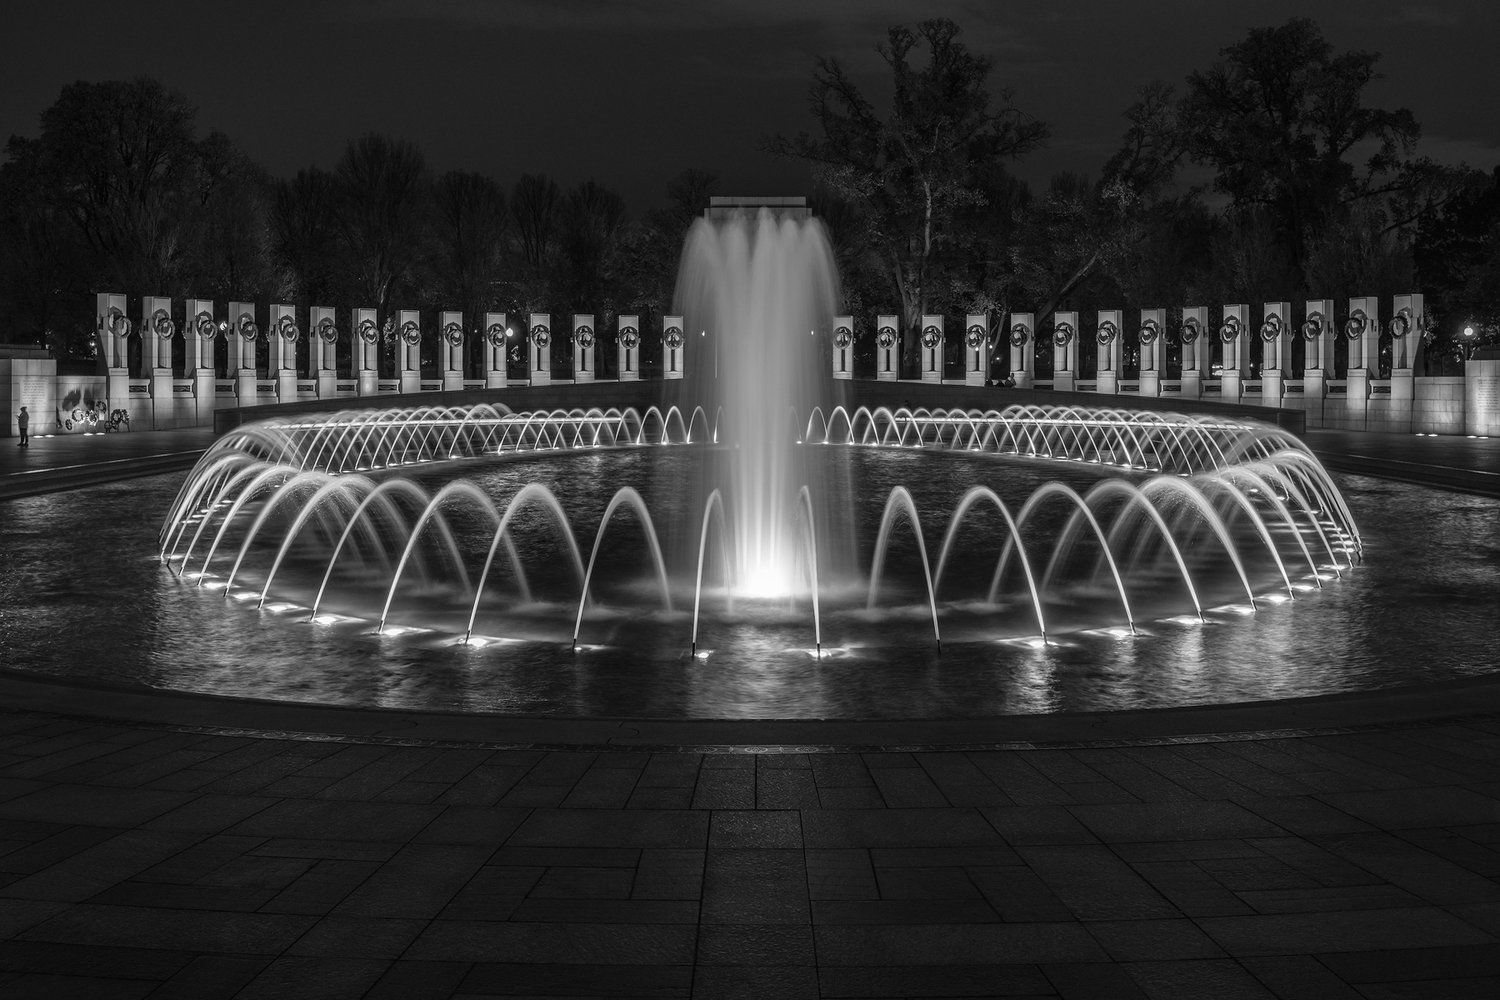
The portrait/street images below were all captured using the concepts I am discussing in this post. All were shot in either AF, S Mode, or Manual Mode using Back Button Focusing, and I used the Joystick to place the Focus Point exactly where I wanted it to be. I love having this kind of control that allows me to craft the image I want. You will notice that I have pushed the ISO around quite a bit and especially so in the lead image of the Lincoln Memorial. While I could set the camera to Auto ISO and set ISO parameters, I tend not to do this and simply select the ISO I feel is right for the scene I am photographing, or to react to my sense of the light, and perhaps what shutter speed I might need for a clean and sharp capture.


The Power of “T”, Back Button Focus, and the Distance Focus Scale
Now, let’s take a look at some other incredible components built into the Fuji X cameras. But, before we go there, I want to talk about the Screen and Viewfinder set-up. The screen set-up is entirely customizable on the Fuji’s and can be accessed in the Toolbox Menu. Aside from the usual things you might want such as AF Mode, Film Emulation, and File Type, the four items that are set on each of my cameras, both in the Viewfinder and on the Live View Screen, is the Electronic Level; the Exposure Compensation, set to Scale; the Histogram; and the Manual Focus Scale, set to Feet. Everything else notwithstanding these four singular settings are the most important to my shooting.
I almost always shoot in Manual Mode, and to be clear I set the Aperture, the ISO, and the Shutter Speed. I work quicker this way and it is the way that my mind thinks while in the process of making an image. My Exposure Mode is set to Evaluative Metering and I take my light readings using the Exposure Compensation Scale and the Histogram, and more so than not I base my exposure judgements on the Histogram. For street work I will periodically check the meter readings using the Exposure Compensation Scale and set it to 0. This usually gets me to within a stop or so of the right reading when I take a shot.
Despite what camera you shoot with I believe having the Histogram viewable while you are making exposure adjustments is a must. With aperture and ISO set then it is a simple matter of just turning the Shutter Speed Dial to manipulate the exposure while looking at the effect in real time using the Histogram. After choosing a shutter speed you can use the front Command Dial to adjust the exposure, up 1-stop and down 1-stop, in 1/3-stop increments. This is quite handy for micro manipulation of the Histogram.
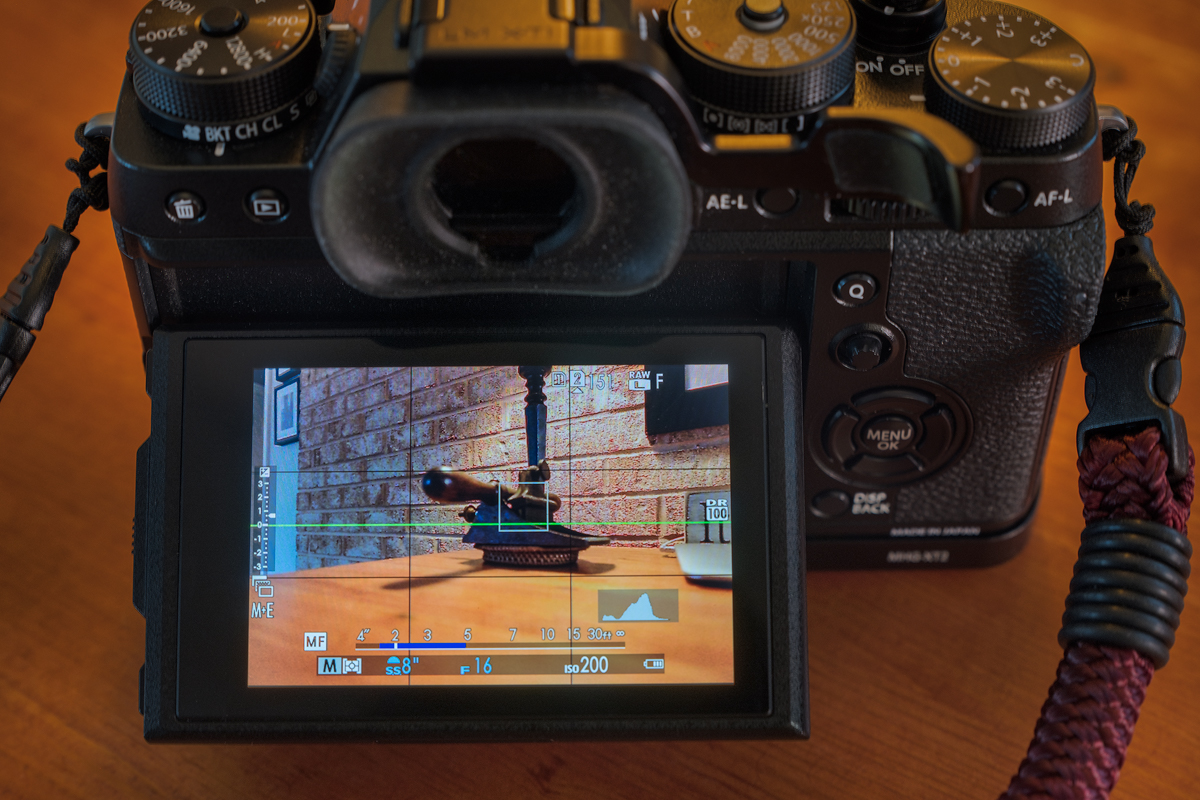
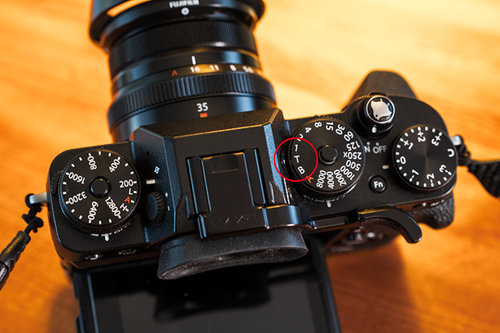 But, here is where the Power of the “T” can simplify this even more. The “T” is located on the Shutter Speed Dial, and when set it allows you to use the Front Command Dial (or rear if you set it that way), to manipulate the shutter speed ranging from 30 seconds all the way to 32,000. So, with my aperture and ISO set, and the Shutter Dial set to “T”, (see the image to the left), the only thing I have to manipulate is the Command Dial. It could not be more simple and I can quickly change aperture to suit conditions, and manipulate the exposure quickly while using the Histogram. Because the Command Dial moves in 1/3-stop increments as well, I can make micro adjustments to the exposure too. I have both of my cameras set this way and with the turn of the on-button, and a quick read of the light, I am shooting instantaneously. I think at the heart of this set-up is simplification – to simplify the mechanical process and make it automatic – so that I can concentrate on making images.
Back Button Focus Now a small word about Back Button Focusing. If you are in Manual Focus Mode and you have the AF-L Button set to AF-L Lock you can use the Button to Back Button Focus. This is a great help for street photography or even for shooting portraits. When in Manual Mode you can use the Joystick to move your focus point, and once you have it where you want it, hit the AF-L Button. The camera will lock focus at that point and you can then press the shutter button as many times as you wish without the camera changing focus. Additionally, if you go to the Set-Up Menu > Button/Dial Setting > AE/AF Lock Mode, and set it to AE&AF On/Off Switch, this will decouple the buttons and allow you to lock focus and exposure when the camera is set to C or S, AF Mode, and you are in Aperture or Shutter Priority. So, much like the Back Button Method, once you have achieved focus, you can select the AF-L Button and it will lock focus until you press the button again. This is the same for the AE-L Button. You will know you are locked in when you see the AF-L and the AE-L indicator in the lower left corner.
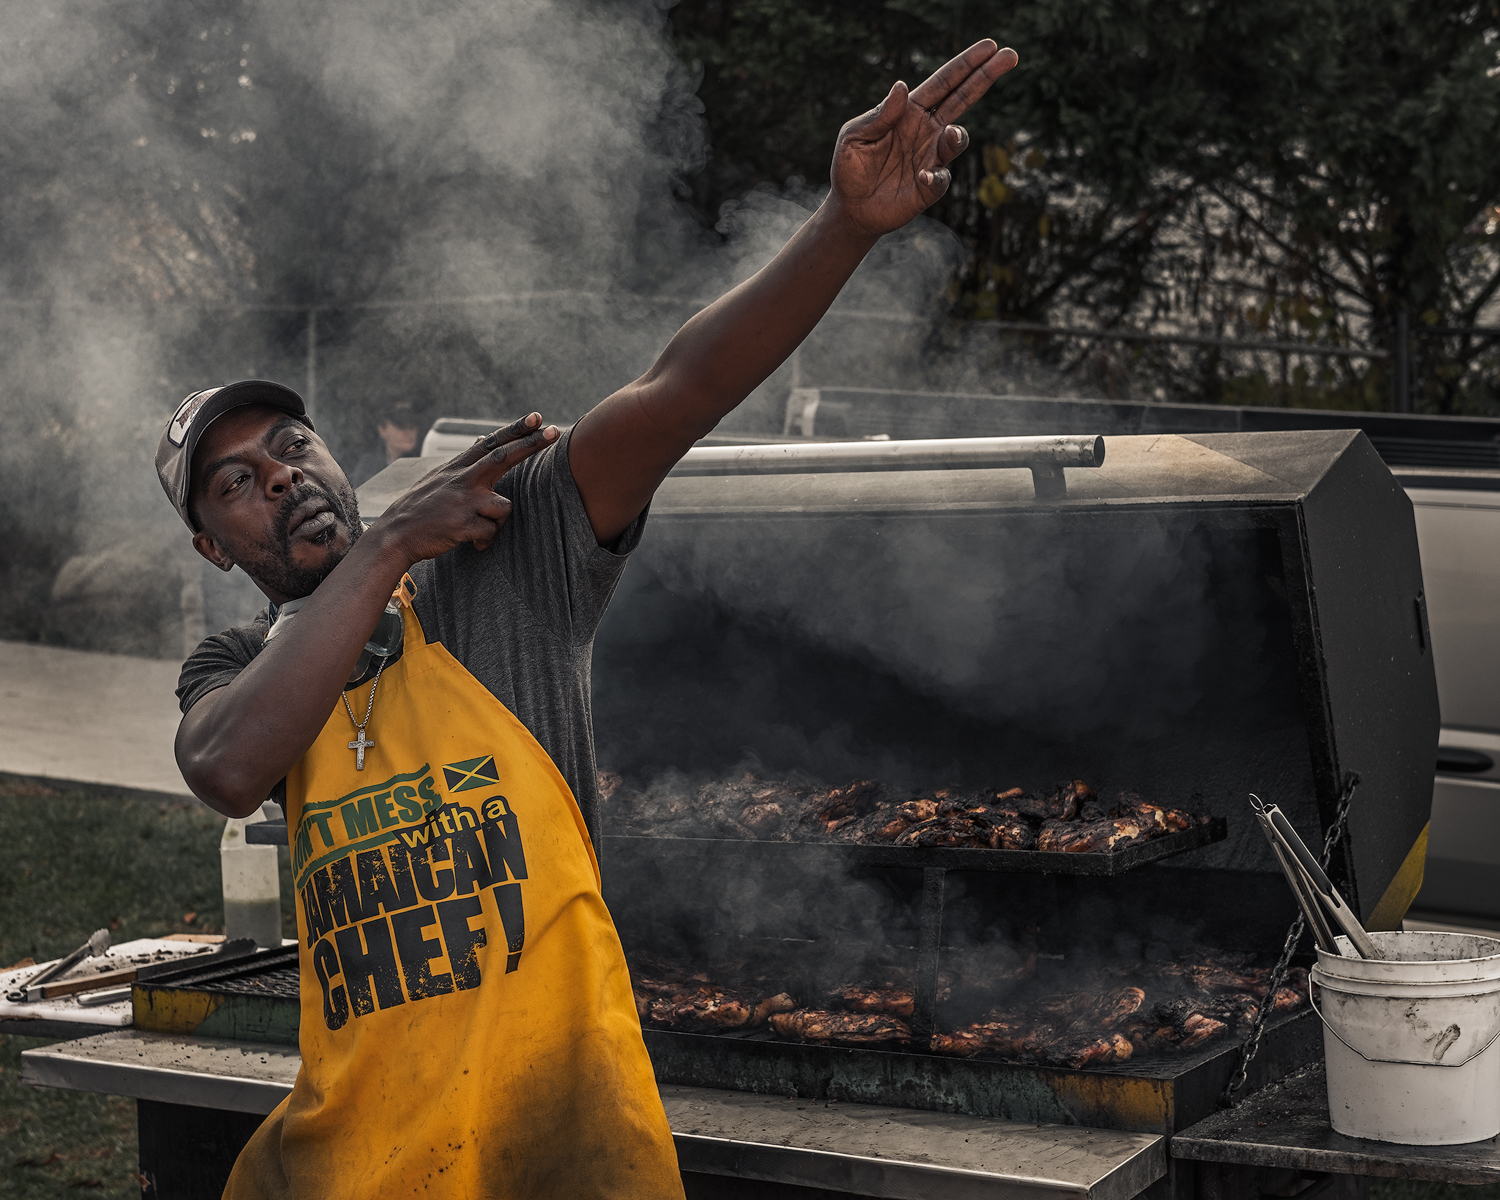
In the image below I had already locked focus in the zone around the grill using the Back Button Focus, and when Chef Chris hit his Usain Bolt pose, which caught me completely by surprise, I was ready to make a capture without worrying about the autofocus kicking in and perhaps missing the moment.
Fuji’s Distance Scale is nothing short of brilliant. Shown below on my Live View Screen, it is the linear graph at the bottom of the screen, just above the shooting data. The White Tick Mark on the graph is the point where I have focused the lens, in this example at 2 feet. The blue line indicates the hyper focus zone of the lens, in this case from just inside of a foot to 5 feet. Since Fujinon lenses are all chipped this information is conveyed to the camera for each focal length. I use this information in concert with Focus Peaking for all of my landscape work and it is extremely accurate. Much like the other settings described in this post this is another technical innovation from Fuji that allows me to focus on image making and not wondering if I am in focus or actually where my hyperfocus zone is located. The Depth of Field Scale has two options – Pixel Basis, and Film Format Basis. Pixel Basis is for images that will be viewed on screens and Film Basis is for images that will be printed. For my work I use the Film Format Basis. To set this go to the AF/MF Setting Menu > Depth of Field Scale > Film Format Basis. The Distance Scale can be set in feet or meters based on your preference, and to set this go to the Set Up Menu > Screen Set Up > Focus Scale Units > Feet.
The image below illustrates the base set-up for my Live View Screen which is also mirrored in my Viewfinder. To the left is the Exposure Compensation Scale; to the lower right, the Histogram; and the Focus Distance Scale along the bottom. The Green Line is my Horizon Level Line. Additionally I have the Composition Grid set in thirds. To set up your screen go to the Set Up Menu > Screen Set Up > Disp. Custom Settings and place a check in the box for the items you wish to display.
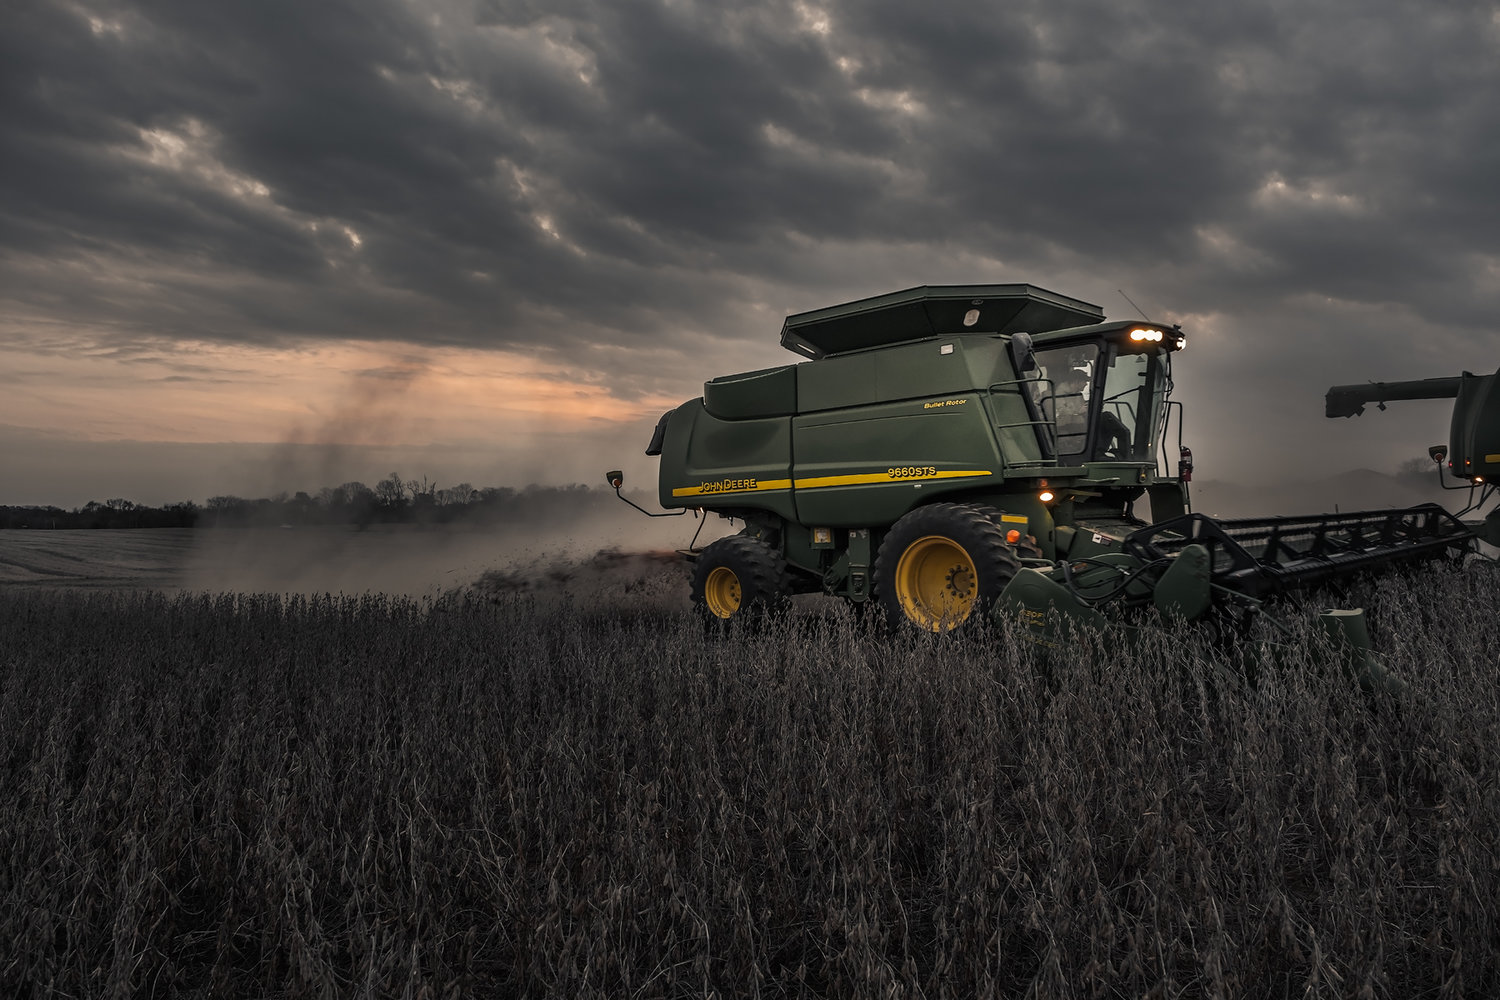
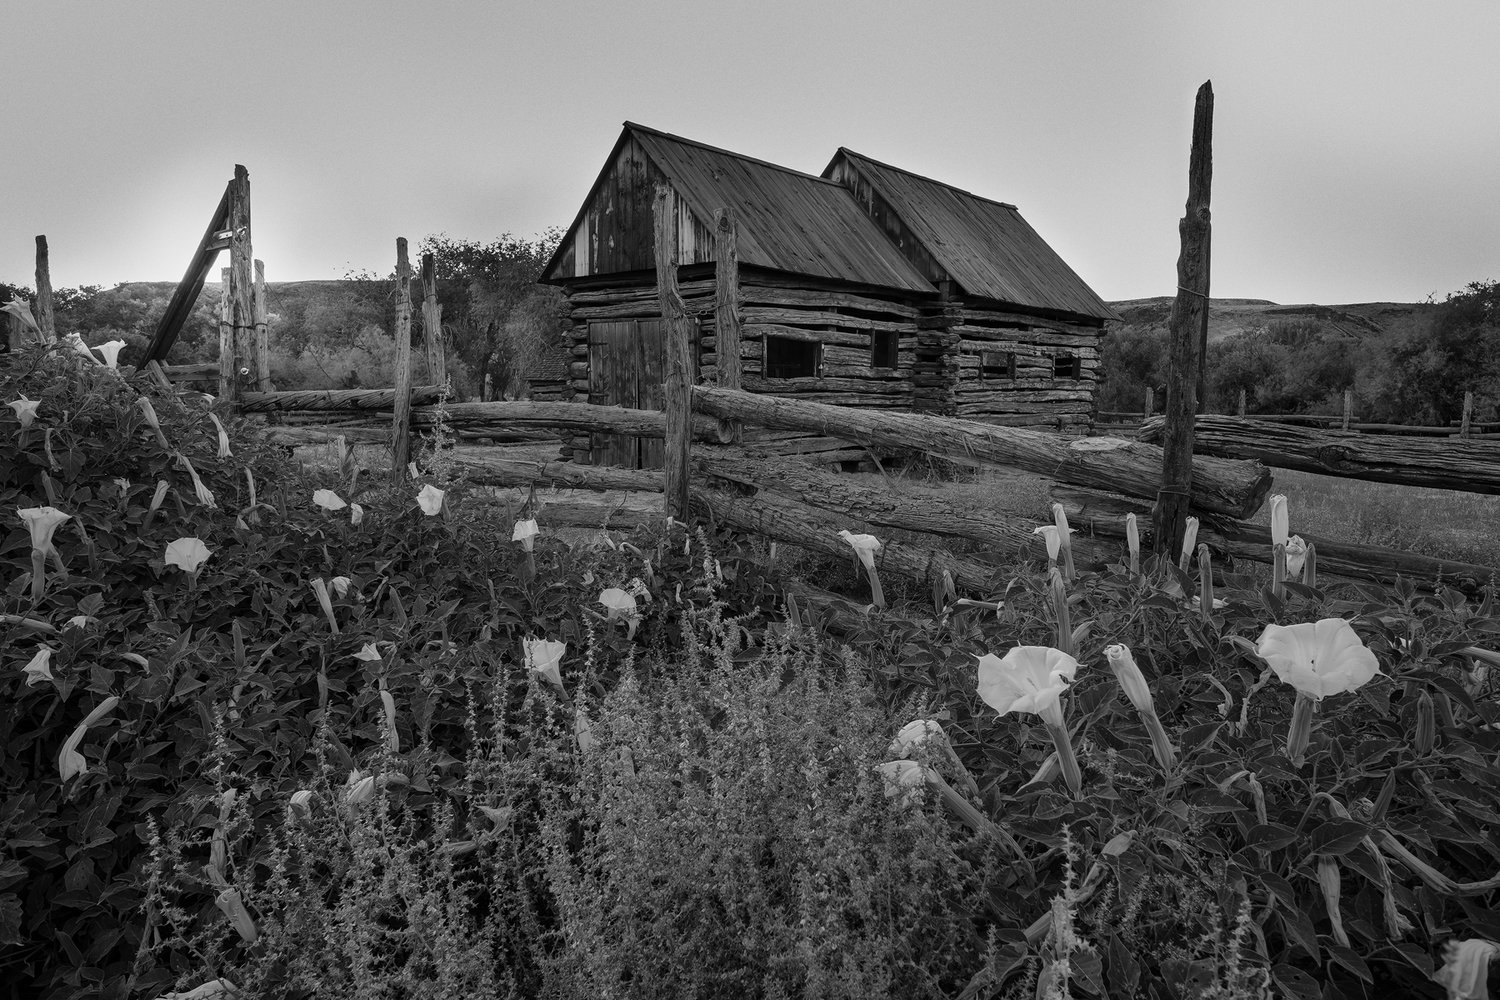
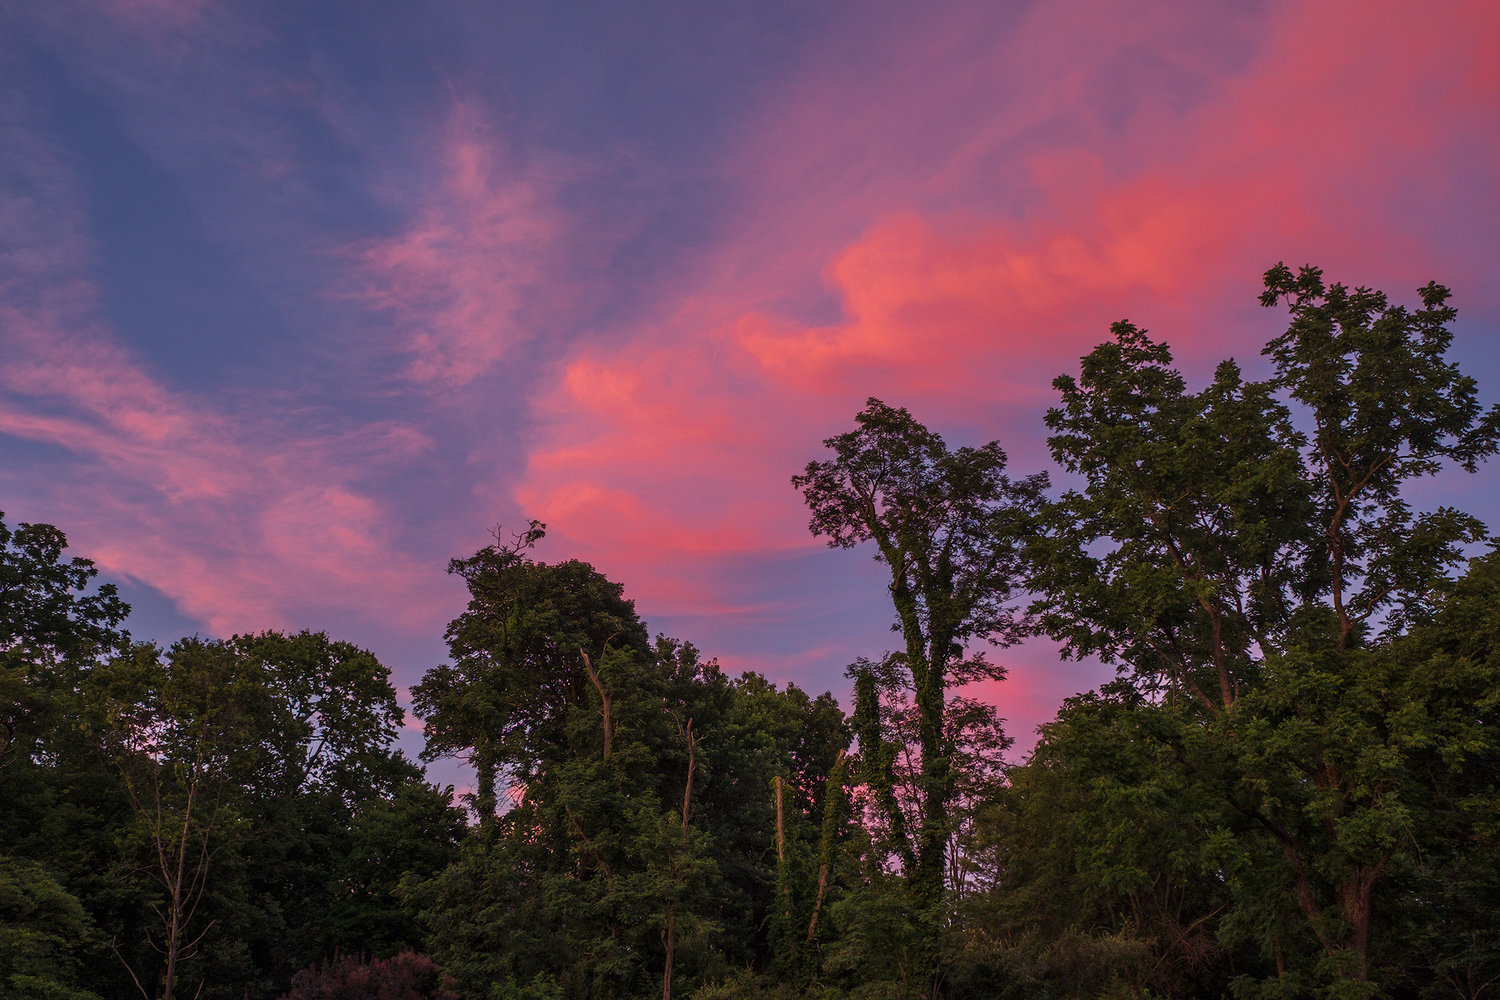
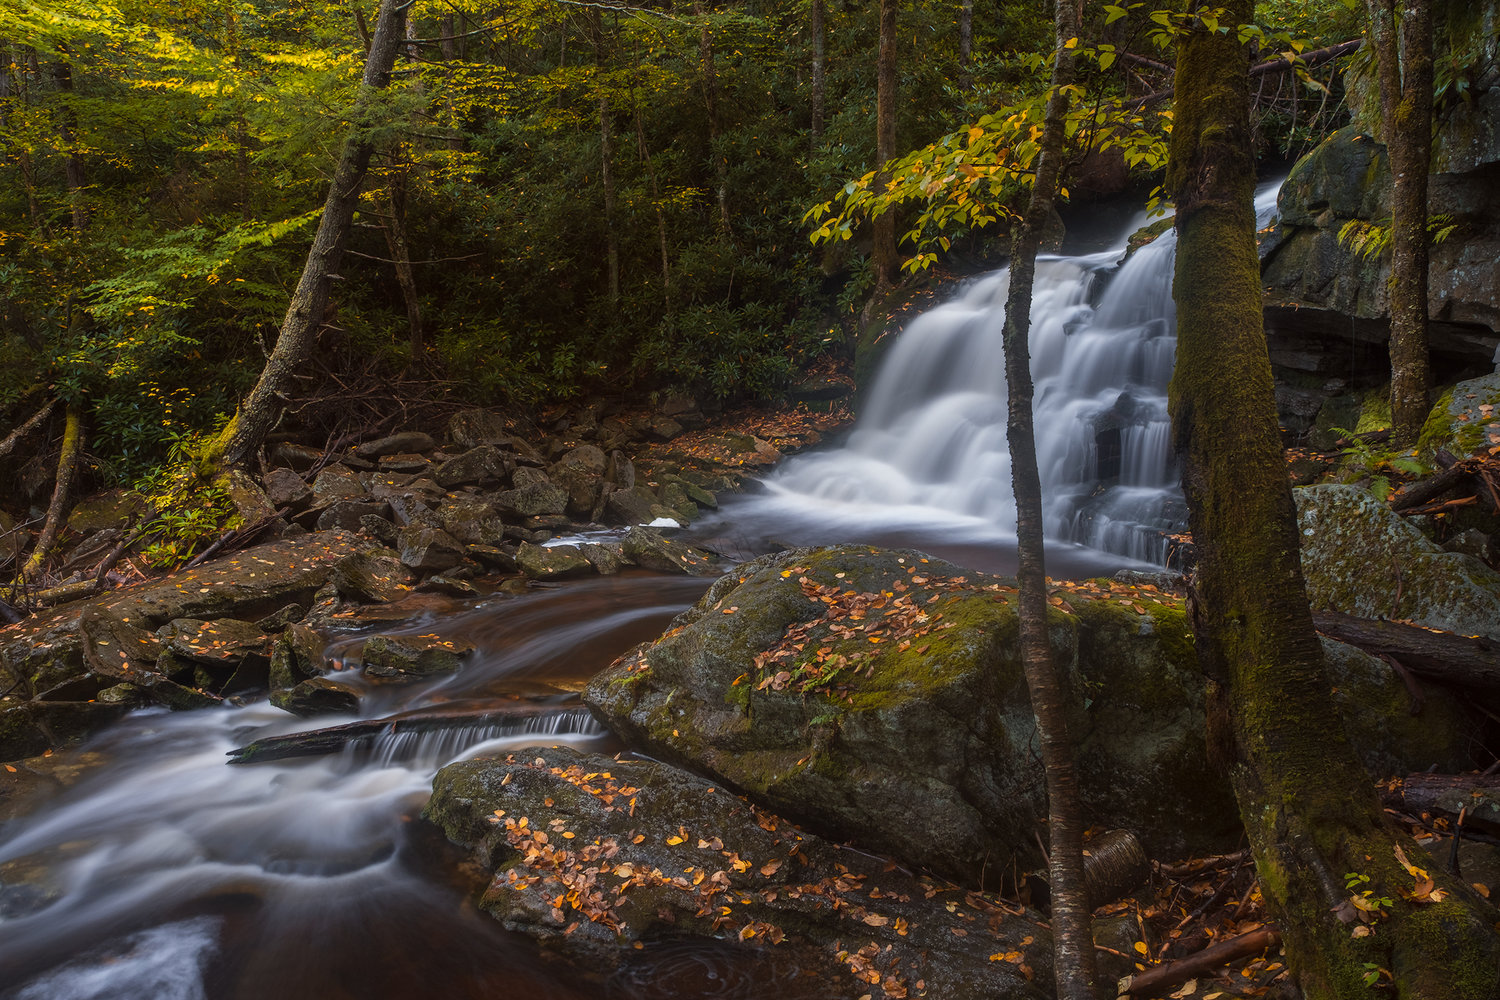
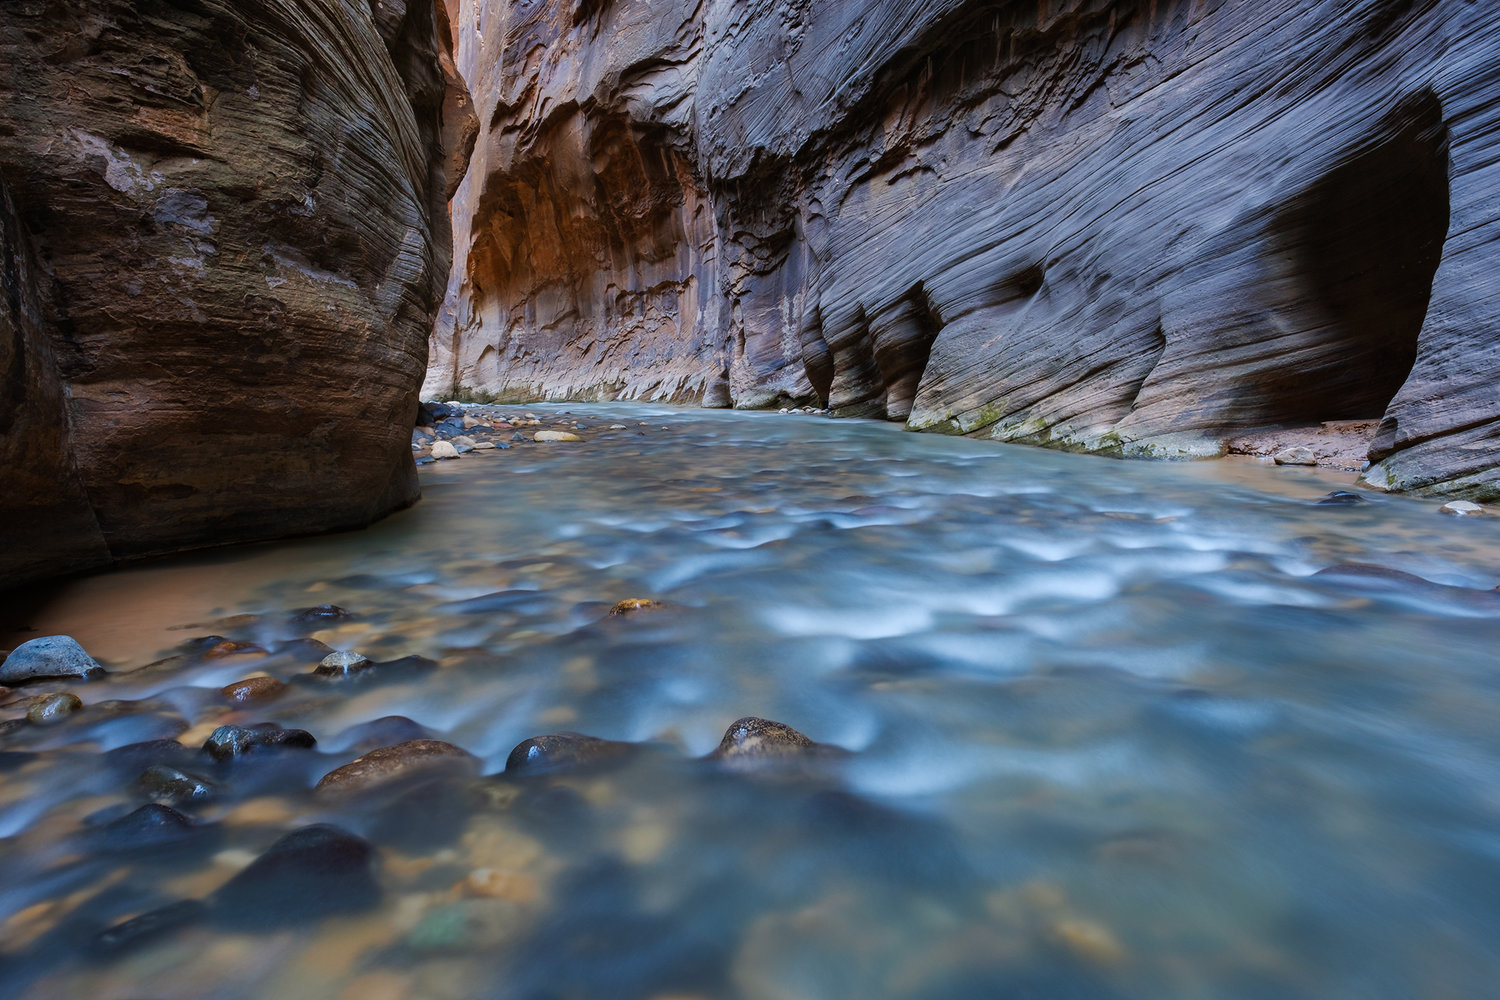
The landscape images below were all shot using the various tools and settings I have outlined. The only real difference comes from my all-manual process when shooting landscapes. This is largely centered around crafting an image with good foreground to back ground sharpness. Utilizing the information in the Focus Distance Scale and Focus Peaking you can achieve some amazing depth of field images, such as the Datura and Cabin image below. I think the creation of the image, and in fact the best images, come when you are free to experience and react to the situation. This can only happen when you are engaged with the scene before you and not buried deep in your menus. In photographic terms, almost nothing is worse than missing the key moment because you were not able to respond to the changing conditions or were buried within the camera settings. In my honest opinion, and largely one of the reasons I made the switch to Fuji, the beauty of the X System is that they have engineered cameras for photographers, that once set-up properly, magically get out of the way of making images.


Hopefully the information contained in this post will give you some insights in to how I set up my cameras and help you see the possibilities for customization. The best camera is the one you have in your hands but it is even better when it gets out of the way of making images. It can be a painful process to go through your camera manual, and honestly, I would rather do anything else but wade through them. But if you tackle it in chunks it is not too bad and it will help you gain control over your camera. And when you have control of the camera , it does not have control over you. If you have any questions please drop me a comment. As always thanks for stopping by and I appreciate your support.
Support us by shopping at Amazon. Thanks.
[easyazon_link identifier=”B01I3LNMAM” locale=”US” tag=”mhmedia07-20″]Fujifilm X-T2[/easyazon_link] [easyazon_link identifier=”B01A8DUR74″ locale=”US” tag=”mhmedia07-20″]Fujifilm X-Pro2[/easyazon_link] [easyazon_link identifier=”B00FPKDPF2″ locale=”US” tag=”mhmedia07-20″]Fuji XF10-24mmF4[/easyazon_link] [easyazon_link identifier=”B006UL00R6″ locale=”US” tag=”mhmedia07-20″]Fuji XF35mmF1.4[/easyazon_link]
Fine art nature, landscape and street photographer. A graphic designer, architect, landscape photographer, and teacher, he works as a media designer for the National Park Service. His work can be found in private collections, exhibits and publications for the National Park Service, museums, galleries, and internationally for corporate clients.


Scott Bennett
December 1, 2016 @ 3:46 am
Robert, thank you for taking the time to write such a thorough article. The best one I’ve seen regarding Fuji X settIngs.
Robert Clark
December 5, 2016 @ 12:02 am
Scott: Thanks so much! I hope it was able to help you with your shooting and settings.
Bob
Wayne Dapper Wilkins
December 4, 2016 @ 3:48 pm
Robert, a great article, well written, well explained thoroughly enjoyed reading it (a few time, to help it stick). One question, looking at many of your landscape images, how can you setup an image on flip screen if it’s dark? Hopefully not too stupid a question
Robert Clark
December 5, 2016 @ 12:16 am
Wayne: NO its a great question! Low light use with the EVF and the LV screen can be a bit grainy but I usually do not have issues until I am outside of civil twilight. As far as focus goes I have learned the hyper focus point on my lenses and can set these without much fuss. As the light comes up a bit I can switch to using the focus distance scale that I mention in the article. Once I have something set I go ahead and make a test shot and can look at both the composition and the focus, and if necessary make a few adjustments in both, before making the final images. The captured image on the LV screen comes in nice and clean and coupled with the histogram informs my exposure decisions moving forward. It is a far cry easier than my days shooting with a 4×5, lol. Hopefully this helps. Drop me a note if you have more questions or thoughts on the set-up. Thanks again for stopping by.
Bob
Wayne Dapper Wilkins
December 5, 2016 @ 2:35 pm
I will drop you a note, quite a few questions.
Thank you so very much
Wayne
Gary Munson
December 4, 2016 @ 7:13 pm
Great write up Robert, one the most informative and intuitive explanations of the fuji x system to date . Your power of “T” section just makes the fuji camera more comfortable to use for me than i had initially realised.
Robert Clark
December 5, 2016 @ 12:04 am
Thanks so much Gary. So glad the article helped you out. I can tell you that when I figured out the “T” and how it could speed up my process I was hooked. I think that is a stroke of genius from the Fuji engineers and another case on how they think about photographers. Thanks again.
Bob
Richard Wedekind
December 6, 2016 @ 4:59 am
Hi Robert
I see you have an X-Pro2 and X-T2 in your camera bag at the same time and you say both cameras are set up the same way.
I’d be interested to hear what your thinking is when you select one camera over the other as there doesn’t seem to be an obvious subject bias between the post examples i.e. there are landscape, street and portrait photos taken with both cameras.
Do you have a particular lens always on one camera over the other?
Cheers
Richard
Jase1125
January 10, 2017 @ 3:17 am
This is great info. I shoot largely the same, but picked up a few tips. Thanks for sharing.
Steven Wetherbee
April 2, 2017 @ 5:27 pm
Hi Robert, Thank you for all of the great information I love this camera. I was wondering if you might share your shadow, highlights and other settings in the Q menu. Thanks again!!!
Kind regards,
Steven
David Julian
May 1, 2017 @ 6:50 am
Robert, The “T” and Front Command Dial method of choosing SS is fast and really helpful. Lots of good ideas here!
Robert Blesse
May 24, 2017 @ 5:51 pm
Many thanks. This was very helpful to me, in particular the parts about setting up for landscape.
DALVINDER
July 5, 2017 @ 9:59 pm
Wonderful article, i use some of the methods you have mentioned already, but require more practice. The whole article was beautifully written and a pleasure to read. Thank you.
Rodrigo Pereira
July 10, 2017 @ 12:55 am
What a detailed, helpful and well written article, and with great photo work to match. Inspirational, thanks for sharing!
Nuno
August 2, 2017 @ 1:01 pm
Hi Robert,
Thank you for sharing your knowledge, this may seem nothing but it’s a precious help for beginners like me.
I have been reading from other sources and one thing I found common was they all set the Noise Reduction to -3 or -4 but you seem to prefer setting it to 0. Can you please uncover a little bit more about this ?
Again, many thanks for the time you spent sharing your knowledge.
Robert Clark
June 6, 2018 @ 10:55 pm
Nuno: It is important to understand that settings, such as NR, applied to through your menus will only effect the JPEG images. So amounts of contrast, sharpening, etc will also effect those images. It will not effect RAW captured files. I almost never shoot in JPEG Mode, preferring to shoot RAW for maximum capture of data. So I keep a lot of these settings at 0 as it is an unnecessary step for me. But if you are shooting more in JPEG than I would suggest shooting some test images with the various settings and see which you prefer. These can then be set up as specific user profiles in your camera. Thanks so much.
Bob
ishootyou
August 7, 2017 @ 12:33 pm
Adobe RGB? Why on earth? Unless your entire post production chain is able to display Adobe RGB not using sRGB is a huge mistake as it will result in wrong colors and contrast. Especially beginners reading this will end up in trouble so better correct that in your article.
Then Auto-WB: another hige trouble-causer! Never use Auto-WB because then every-single-shot will have a different WB. This will wreak havoc when trying to get matching skin tones in a photo series! It is always better to set WB to a fixed value as then all corrections will have to be made just ONCE as they will apply for all shots.
It’s great you took the time to share this but sharing wrong or misleading information is of no help really…
The good Doctor
November 8, 2017 @ 6:18 pm
I had the same thoughts you did about sRGB vs Adobe RGB. Auto-WB won’t matter (much) assuming RAW using Lightroom as you can ‘sync’ WB across a series of photos. If you are shooting JPG only, setting WB for scene is more predictable and should result in quicker post processing.
John DiJulio
January 19, 2018 @ 7:48 pm
sRGB is only good for output to web. Since Adobe RGB is a large color space, why not shoot in that and then convert down to sRGB before editing if you know your output is web? Why would you limit yourself from the start to work with the smaller color space if you can easily convert after.
I agree that auto wb is a bad idea in pretty much any situation where you’ll want to edit a series.
ishootyou
January 19, 2018 @ 8:05 pm
Shooting in Adobe RGB only makes sense when your entire post production chain is capable of displaying that color space. Even the most recent iMacs can only cover <80% of Adobe RGB. There is no such thing as a "conversion" from Adobe RGB to sRGB - this isn't to be seen as downscaling 4k to 1080p which comes with huge benefits. When saving an Adobe RGB file in sRGB mode, you are cutting off (and losing) those parts of the color spectrum.
John DiJulio
January 19, 2018 @ 8:27 pm
Right so why start smaller and stay smaller. Why not shoot in the larger color space that is capable of displaying all colors sRGB can and then cut off those edges if you plan on only displaying for web.
I think telling people to start in the smallest color space possible just so that their monitors can display it fully is lazy. Its going to leave you with less options and if you’re really editing photos you know your eyes are a terrible judge if colors are correct. Correcting by data is the only reliable way of producing correct colors so it doesn’t matter what your monitor can display in the end
ishootyou
January 19, 2018 @ 9:21 pm
I really appreciate your effort to make yourself clear but you are wrong. Changing the color space after editing will change the look of ALL colors including those that lie within BOTH color spaces. You can verify this by simply changing your screen from AdobeRGB to sRGB. Adobe RGB only makes sense if you are printing your work very often and if these printers are compatible. In order to display images on the web correctly (or on a customer’s computer) you must convert them to sRGB. Doing so, you will mess up the colors of your images as they will show dull and less vibrant.
John DiJulio
January 19, 2018 @ 9:55 pm
Which is why I said change to sRGB before editing if that will be your output. Then you still have the option of Adobe RGB. I don’t get how you can say straight to sRGB is always better because it saves you a click of a button.
ishootyou
January 19, 2018 @ 10:12 pm
Please do some research. Once for all, shooting in ARGB is wrong unless your pp chain AND the output format (e.g. high end print) demand this color space. If you shoot ARGB and then “convert” to sRGB you will mess up the ENTIRE color range of your images. Editing in ARGB on a machine that can’t display ARGB is even worse. Stop spreading the word that shooting in sRGB is shooting in a crippled format. Please understand that I won’t be able to follow this any further.
John DiJulio
January 19, 2018 @ 10:35 pm
Thanks for assuming that I haven’t done my research. I guess I’m set up for studio quality prints in my workflow and you are set up for more web based uses. Conversion from Adobe RGB to sRGB does not “mess up the ENTIRE color range” of an image, don’t be so dramatic. It shifts it into the sRGB space which of course will have a slight change(which i don’t know how you would notice if your monitors can’t display Adobe RGB), but you’re about to edit the image anyway so what does that small shift matter? Anyway, thanks for regurgitating every gear-head article to me like it has real relevance in making prints or actually understanding color space.
nate
January 21, 2018 @ 5:06 pm
Contrary to what you say, it is absolutely possible to work in a larger color space, then transform to a lower color space on export. There are obviously different options to how you contract that color space. Depending on your needs you can choose to keep the colors 1:1, that does mean some truncation will happen at the edges. Or you can shift all the colors to the middle, where as you say you “mess up” the entire range.
Also, with a proper calibrated monitor and proper software, of course you can display an sRGB Image in its proper color space side by side with an aRGB Image. Also my sRGB images look the same when display on my monitor calibrated to sRGB as they do with the monitor calibrated to aRGB. Those problems you talk about are nonexistent.
The Problem with choosing sRGB at capture is, that you might truncate already there. An example would be taking pictures indoors in the evening. You could accidentally blow out the highlights on your R-Channel, which you will never be able to recover. If you shot in aRGB, it allows for “stronger” Reds, so that could have saved you. Then in Post you can pull back the strong reds to an sRGB Range.
Robert Clark
June 6, 2018 @ 11:13 pm
John: Fuji Cameras are particularly good with reading WB, and across a variety of scenes and lighting situations. Most people, especially those starting out with these cameras, will benefit with learning how to shoot them before going on to manipulate WB. Setting up a preset to balance a series of images is quite easy, and because I shoot specifically RAW I can make WB adjustments quite easily and too taste. In a studio scenario, with lights, I would balance. But in landscape work, and on the street, auto WB is just fine.
As to aRGB or sRGB, well, that is just a ridiculous argument (note: not saying that you are being ridiculous). If all one is doing is posting to the web then go on with sRGB. But, I post heavily to the web, and I print so my workflow is built around this with calibrated monitors and printers/printer profiles/soft proofing. So I want the maximum capture of information. My workflow follows from LR to PS, in aRGB. When a master is completed I will then make a web version, which is converted to profile as an sRGB. And that conversion matches the master without question. In fact if you compared the image in FB, or on my website, all in sRGB by converting to profile, and looked at my PS masters they would look exactly the same, and more specifically the prints would be just as vibrant.
Cheers
Bob
Photography By JW
January 6, 2018 @ 10:59 am
Just bought my XT2 and loving this info, certainly helps as the learning curve from xpro1 is possibly greater than moving to that from canon, many thanks
Robert Clark
June 6, 2018 @ 10:56 pm
Thanks so much. Hope it helps you.
Bob
Jonathan Heyes
September 9, 2020 @ 10:35 pm
I have a problem with my XH1 and so far no one has been able to answer how to solve this problem even fuji haven’t replied. So the question which is simply this; I shoot in manual mode only and I use vintage lenses/ B&W. For some reason only on certain ISO or shutter speeds the screen changes from 1/1 to Movie Setting and keeps bouncing between the two screens as if trying to find the optimum, how do I stop this. I do not wish to use video and if possible would like to delete it’s option.