Premium/ How I edit my B&W photos
From time to time, someone asks me about post-processing. How I edit and convert my photos to black and white. And how much time it takes me. I always just shrug my shoulders and reply that I don’t do anything complicated with the photo, no hours of editing.
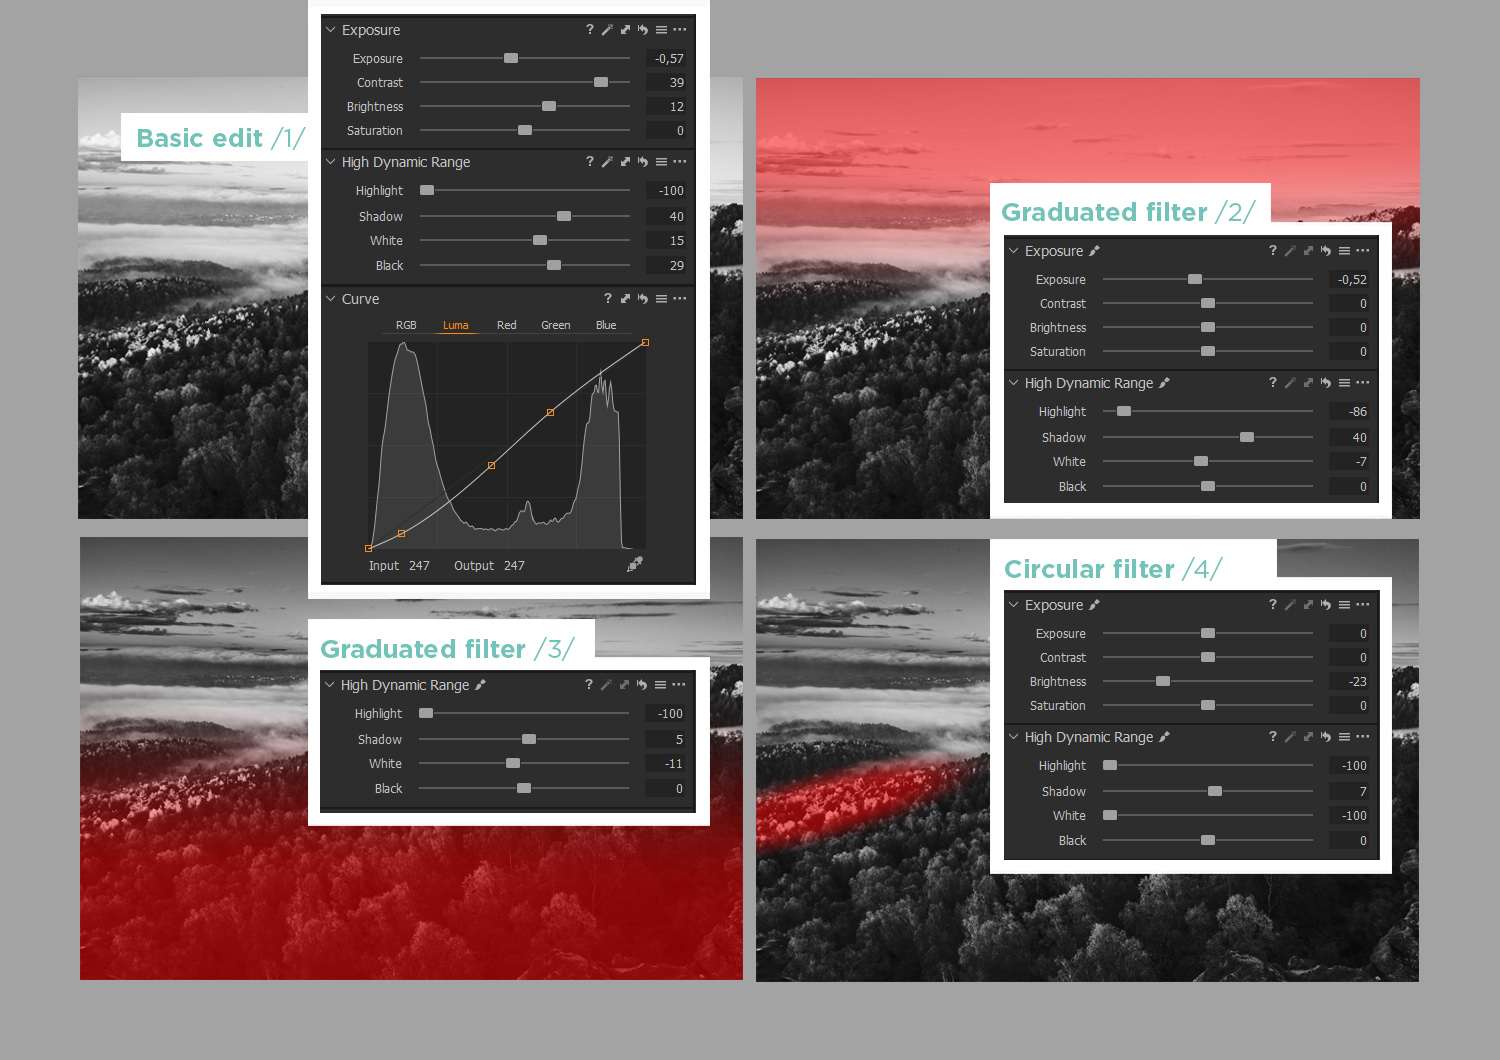
It’s always a matter of minutes. And a few simple steps. I adjust the tonal curve a bit, lighten the shadows or pull down the highlights. Basic stuff. I don’t want to spend more time than necessary in front of the monitor.
Before the Fuji system, I used to shoot only RAW, but with Fuji, I started to use JPEG as well. I shoot directly with the Black & White preset (JPEG + RAW). Sometimes JPEG is enough for me. I take the RAW files in more complicated tonal and lighting conditions, but it’s always just a quick edit.
Maybe it’s my long-ago experience shooting on film, or just some internal setting of my mind, but I try to treat digital very much like analogue – I shoot straight black and white (so it is similar to shooting on a black and white negative, with the advantage that I can already see the black and white image in the viewfinder).
Even the RAW I see in Capture One is straight Black & White – so I don’t know the color appearance of the image, unless I want to switch it to some color profile myself, and I usually don’t want to.
When I was thinking about how to share the few things I do with my photos, I came to the conclusion that it would be easiest to categorize them by the amount of editing. And somehow try to generalize the most common practices that I use:
• No post-processing (SOOC JPEG using in-camera recipes)
• Slight JPEG post-processing
• RAW editing
First category: No post-processing – SOOC JPEG

CONTINUE READING…